1. Introduction
Techila Distributed Computing Engine is a distributed computing middleware and management solution that brings an on-demand supercomputer to every desk. The solution is designed to save the time of users and IT experts, to solve challenges related to parallel application development and deployment, and to speed up the idea-to-deployment cycle.
This document is a quick start guide that describes how you can easily set up a TDCE environment and run your first computational Project in TDCE. For more detailed information, please see the document Techila Distributed Computing Engine in Google Cloud Platform Marketplace. The full user guide also describes various other topics not covered here, such as making CPU quota increase requests and checking monthly Techila charges.
2. Starting the Techila Server
This chapter gives a short description on how to start the Techila Server, for more detailed information please see the this chapter in the user guide.
To start the Techila Server, navigate to https://console.cloud.google.com/marketplace/details/techila-public/techila using your web browser and click the Launch button.
When deploying the Techila Distributed Computing Engine environment, you will be have to define a name (1 in the screenshot) for the deployment. You will also need to speficy a name, ID and description for a new Service Account (2 in the screenshot). Then choose the geographical Zone (3 in the screenshot) where you want to have the system deployed. Typically it is good practice to choose a geographical zone that is close to your computer’s location. This will help reduce the network latency between your computer and the Techila Server.
Other settings such as machine type and the IP ranges (4 in the screenshot) for various ports can be left at the default values unless you specifically want to limit the range.
After modifying the deployment settings, click the Deploy (5 in the screenshot) button to start the deployment process as illustrated in the screenshot below.

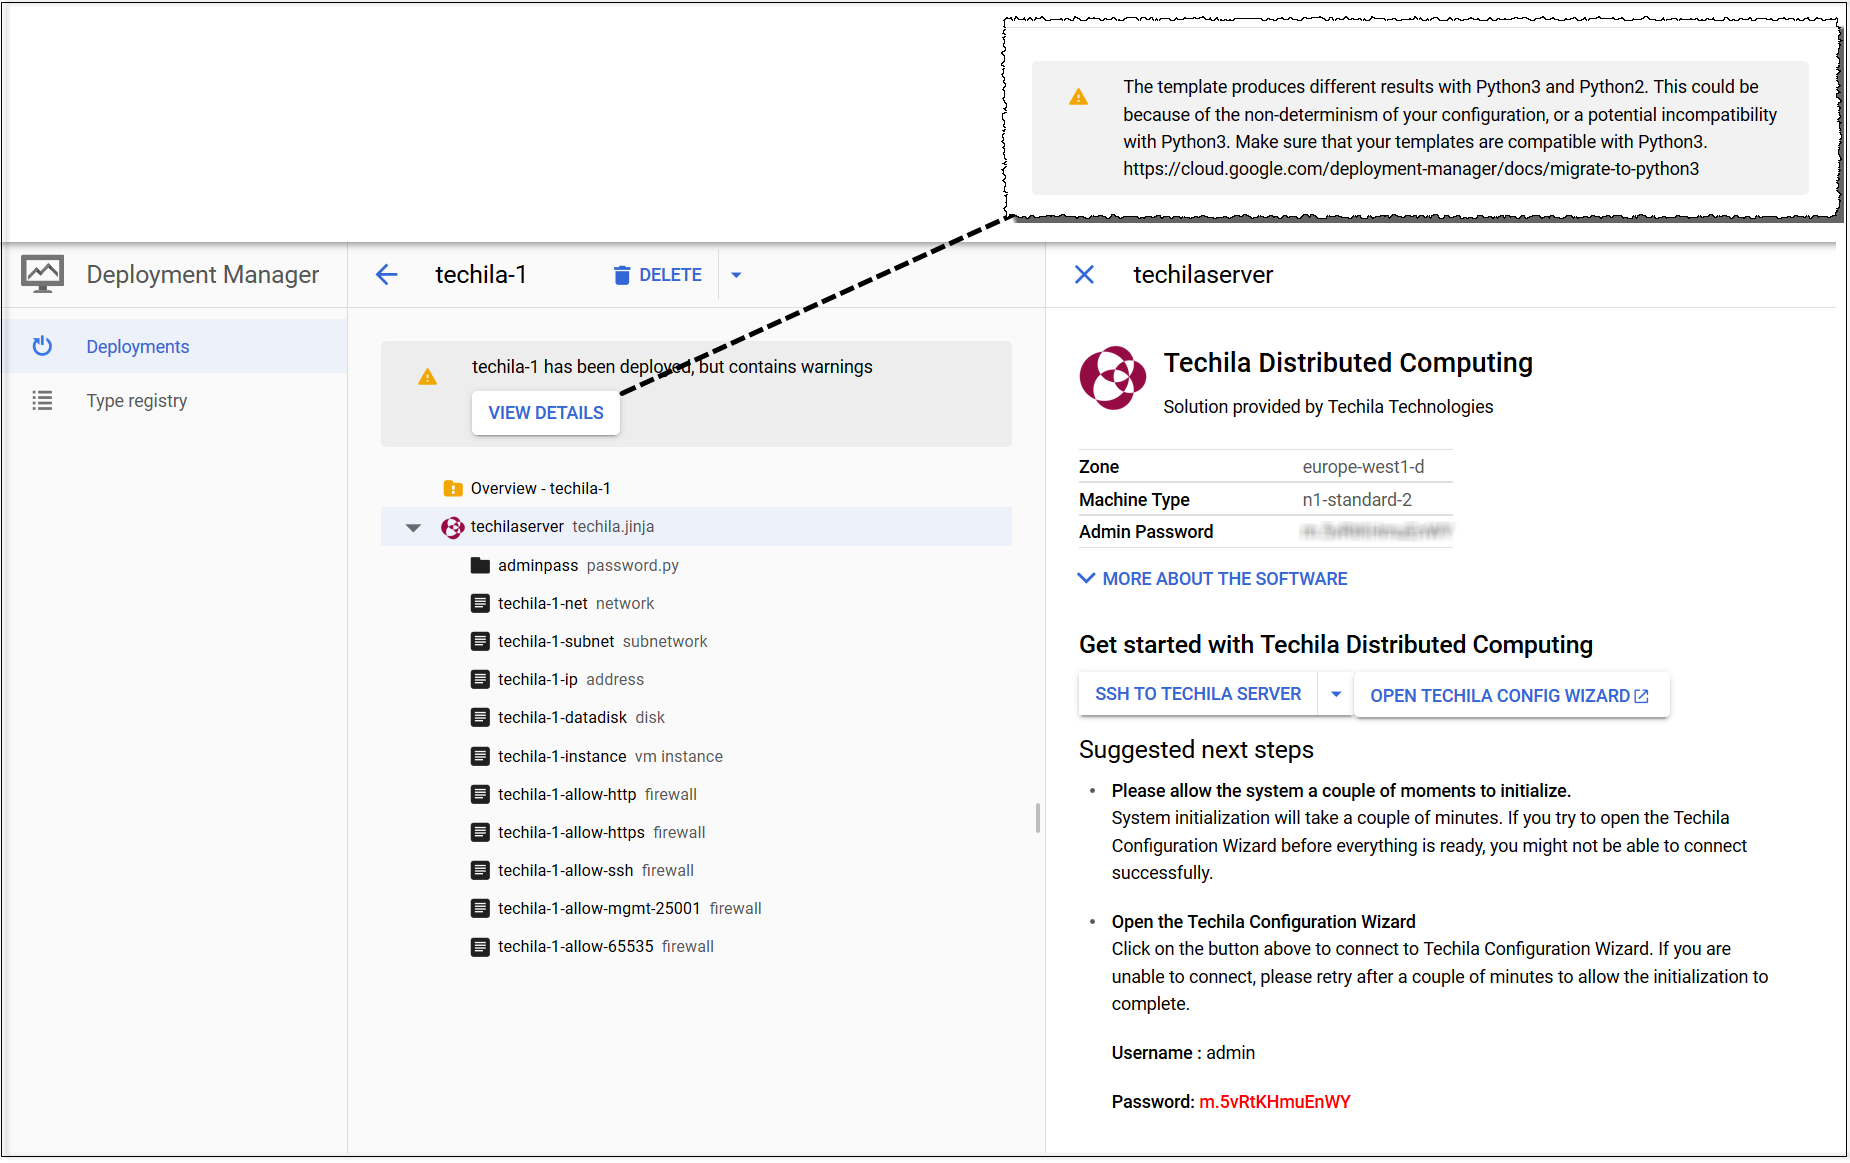
Wait for the deployment to complete. This may take several minutes. After the deployment has been completed, a screen similar to one below will be shown where all resources are shown in Created status.
3. Accessing the Techila Dashboard
This chapter gives a short description on how to access the Techila Dashboard, for more detailed information please see the this chapter in the user guide.
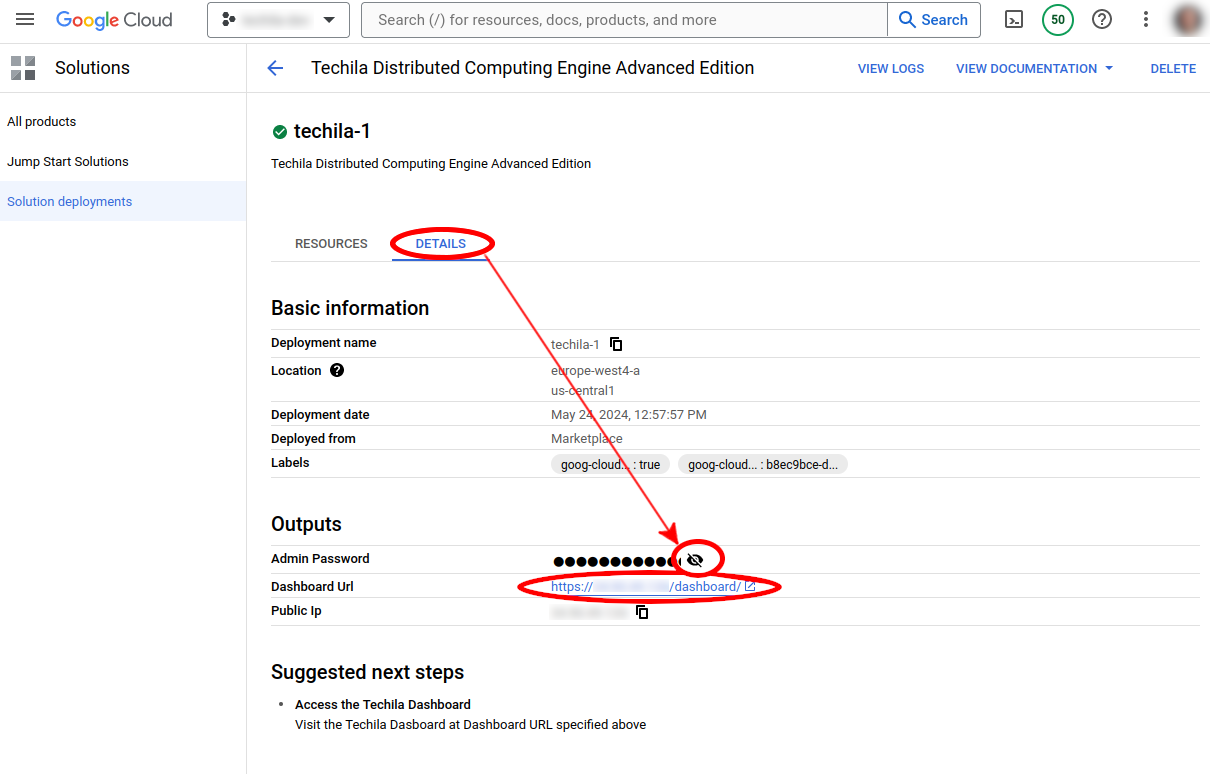
Switch to the Details tab. Then click the eye icon to display the Admin Password. You can then copy the password into the clipboard. Then click on the Dashboard Url link to open the Techila Dashboard login page.
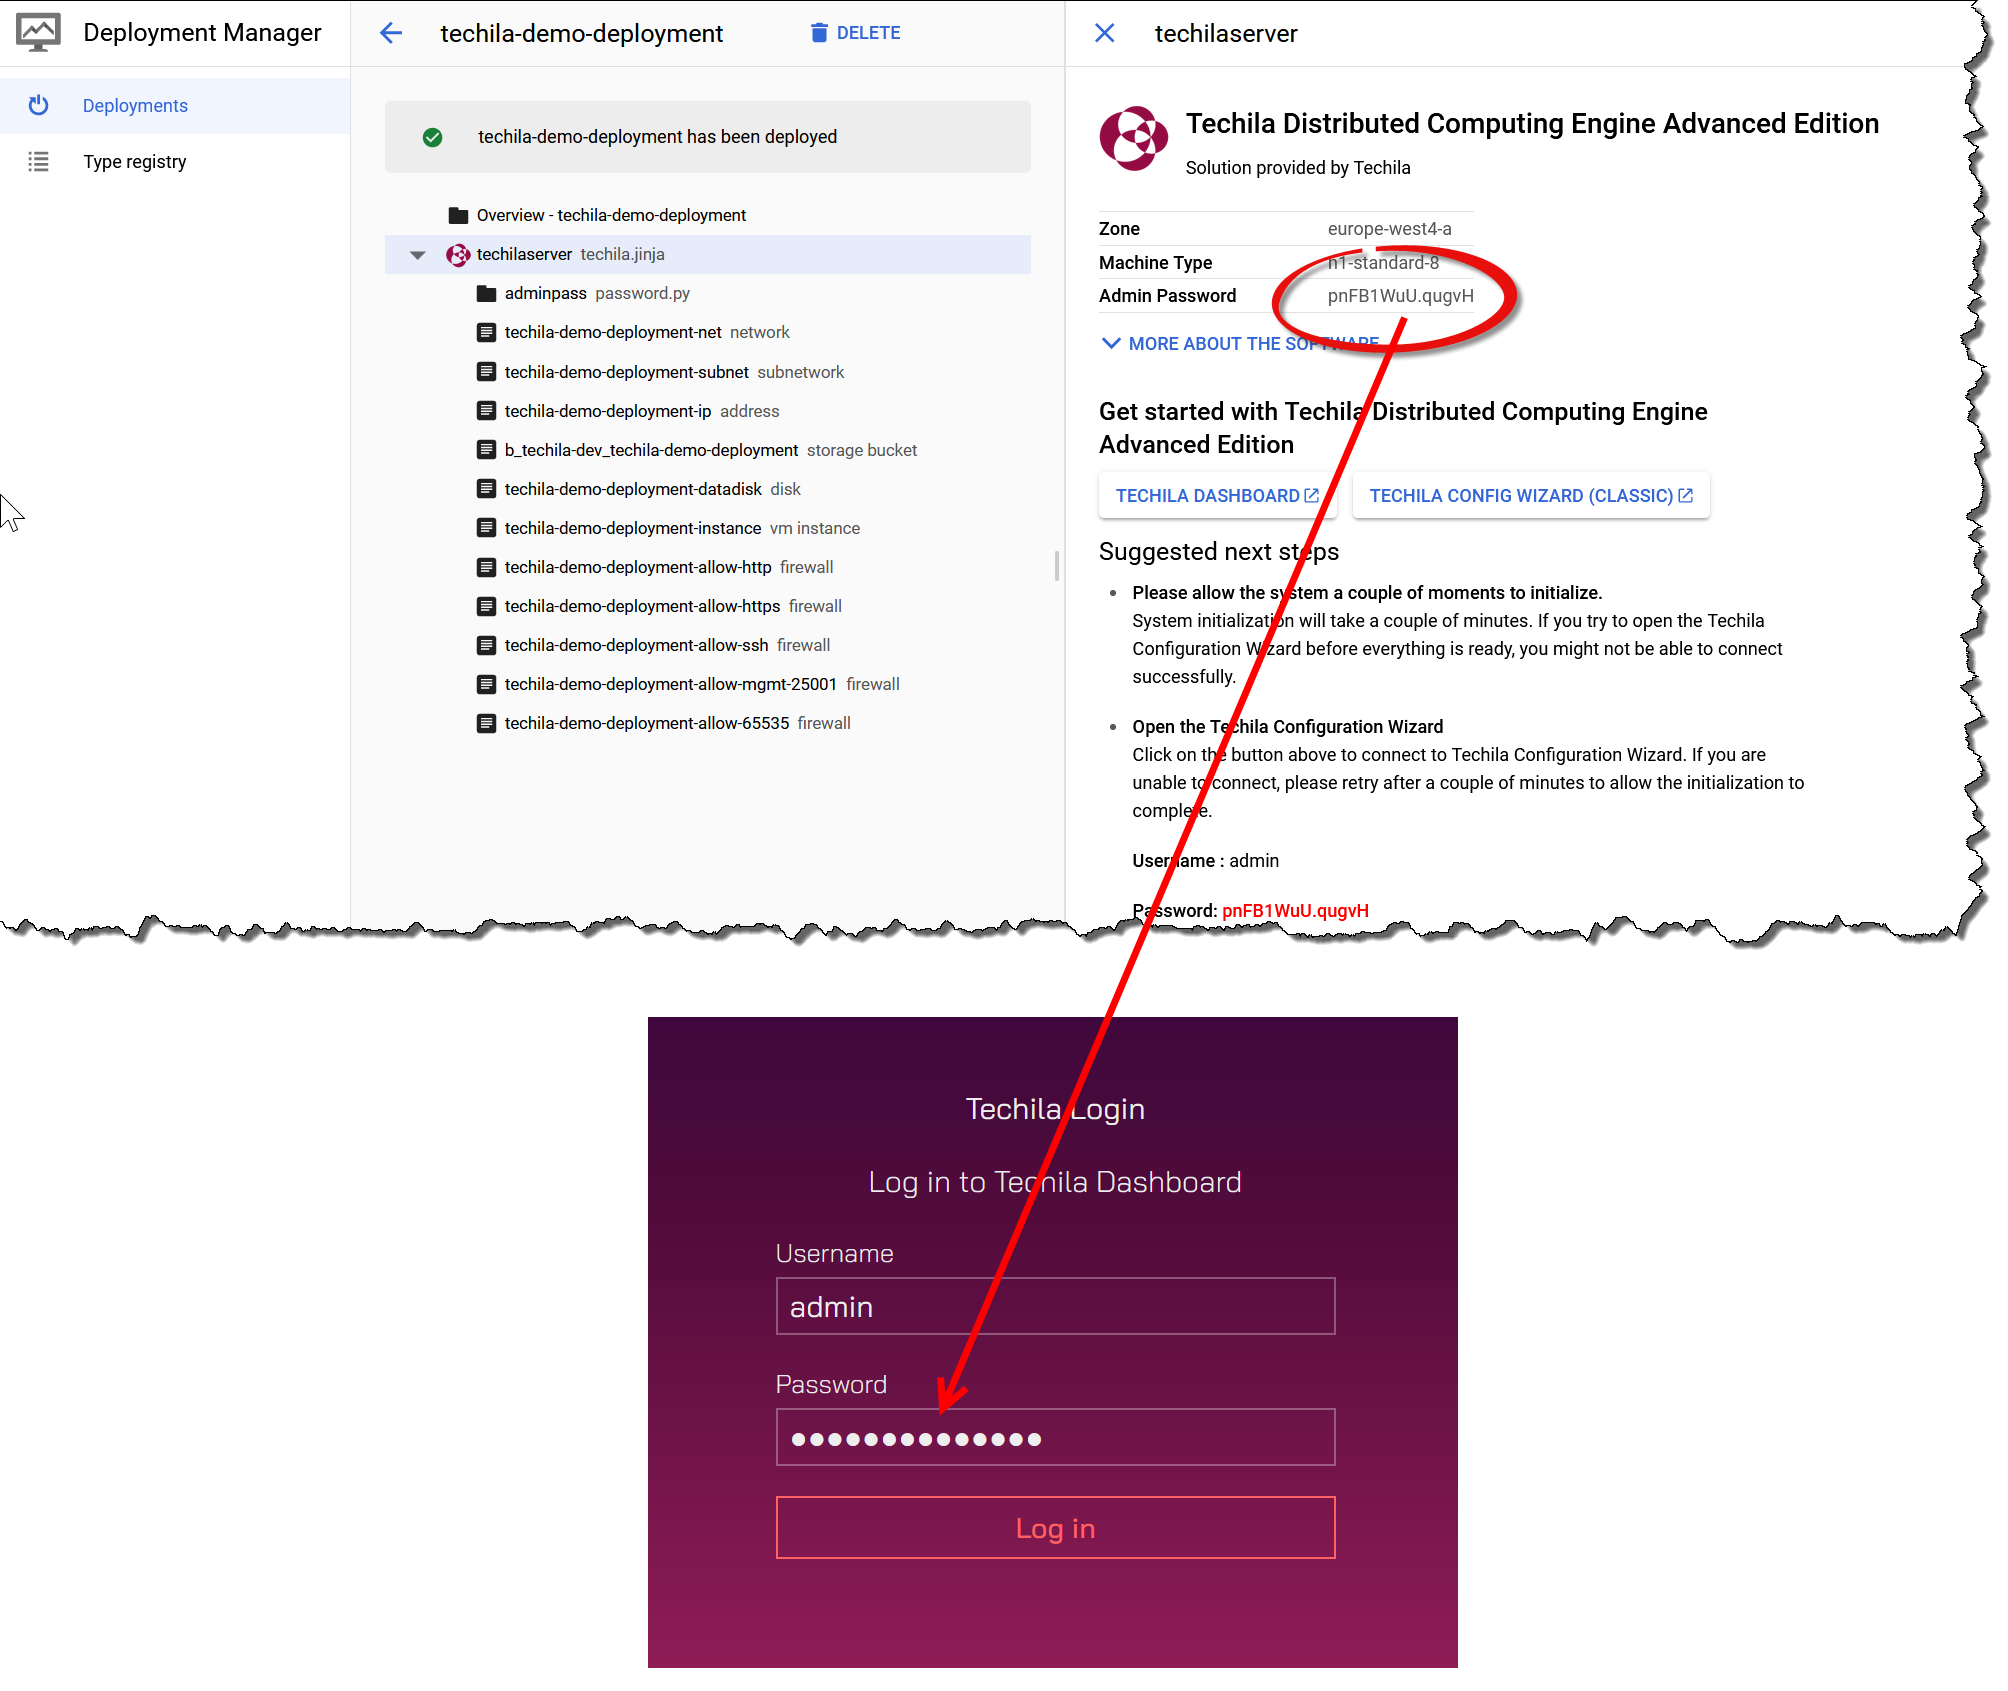
Enter 'admin' as the username. In the password field, paste the Admin Password value from the Google Cloud Platform Console to the password field as shown in the screen capture below. Click the Log in button to log in.
After logging in, you will be presented the first page of the Techila Dashboard. This page will be used to download the application plugins (delivered in a file called TechilaSDK.zip) from the Techila Server.
4. Downloading and Configuring the Application Plugins
This chapter gives a short description on how to download and configure the application plugins, for more detailed information please see the this chapter in the user guide.
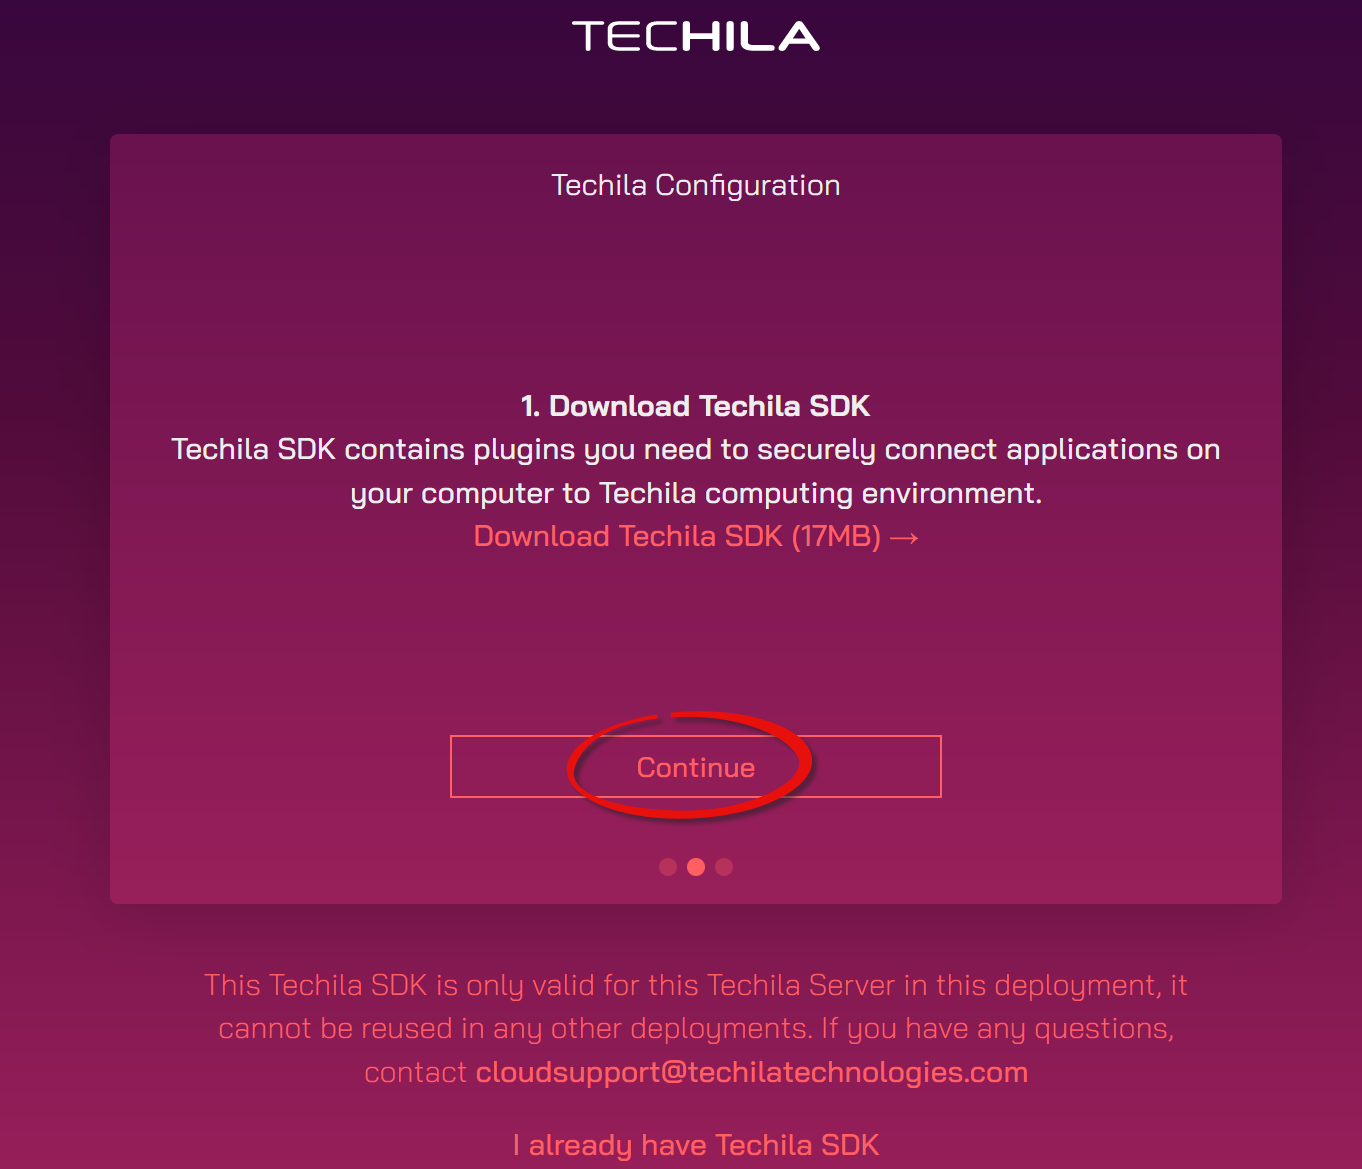
The application plugins are delivered in a file called TechilaSDK.zip. In addition to containing the application plugins for e.g. MATLAB, Python and R, the TechilaSDK.zip contains ready-to-run examples for various programming languages. The application plugins package is also referred to as the "Techila SDK".
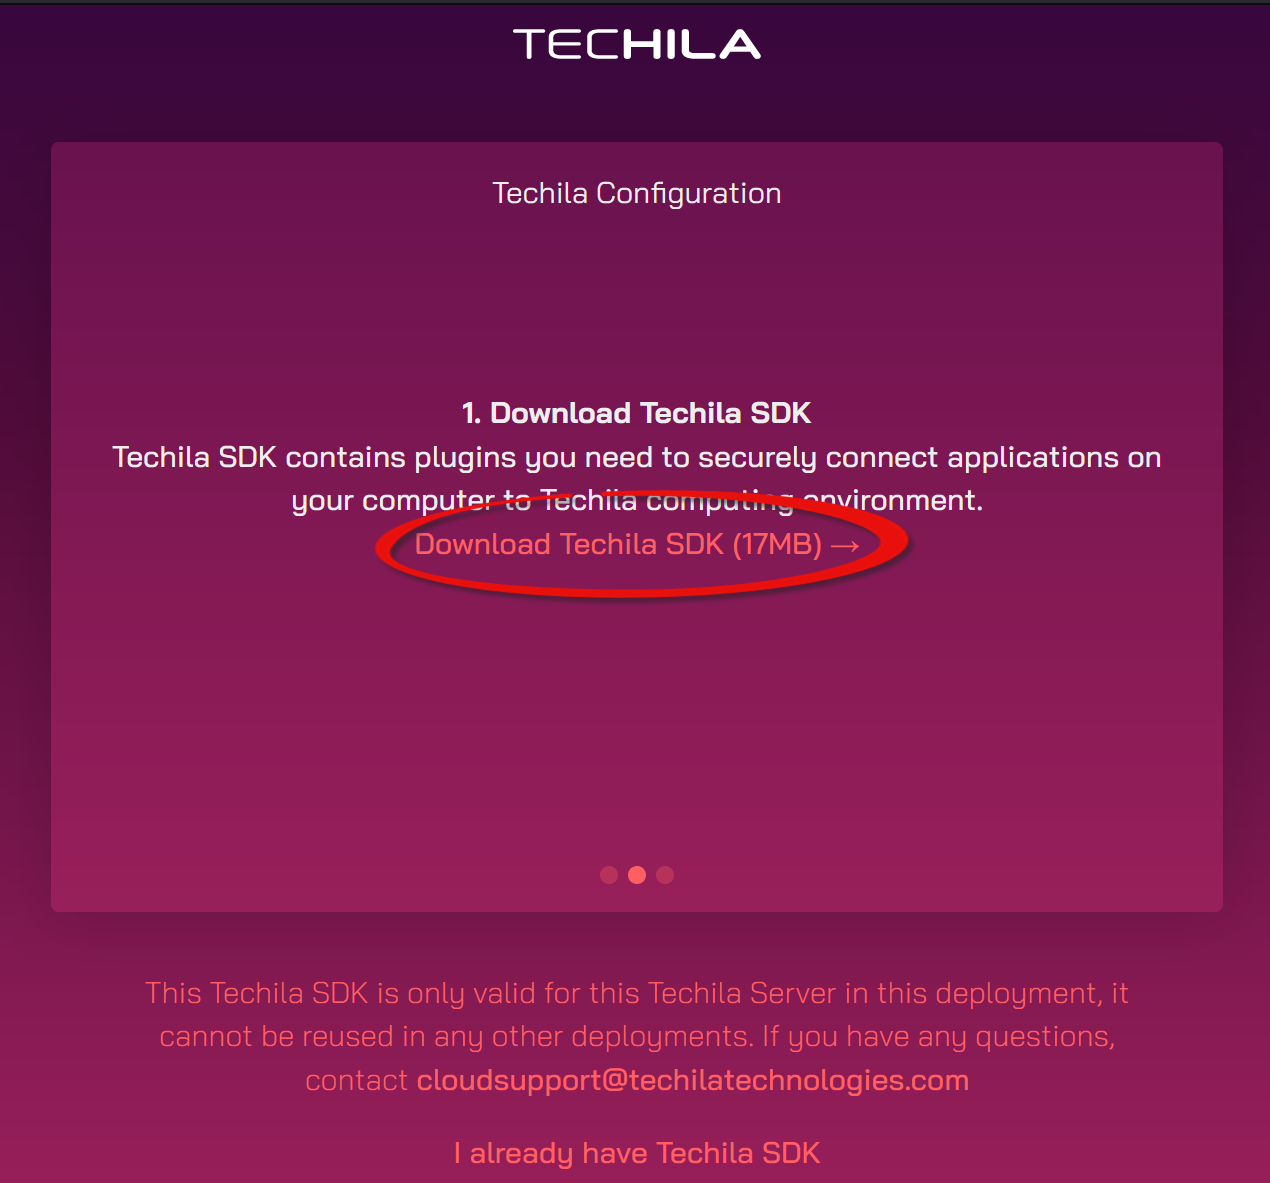
Click the highlighted link to start downloading the application plugins (TechilaSDK.zip) to your computer.
After downloading the file, click the Continue button.
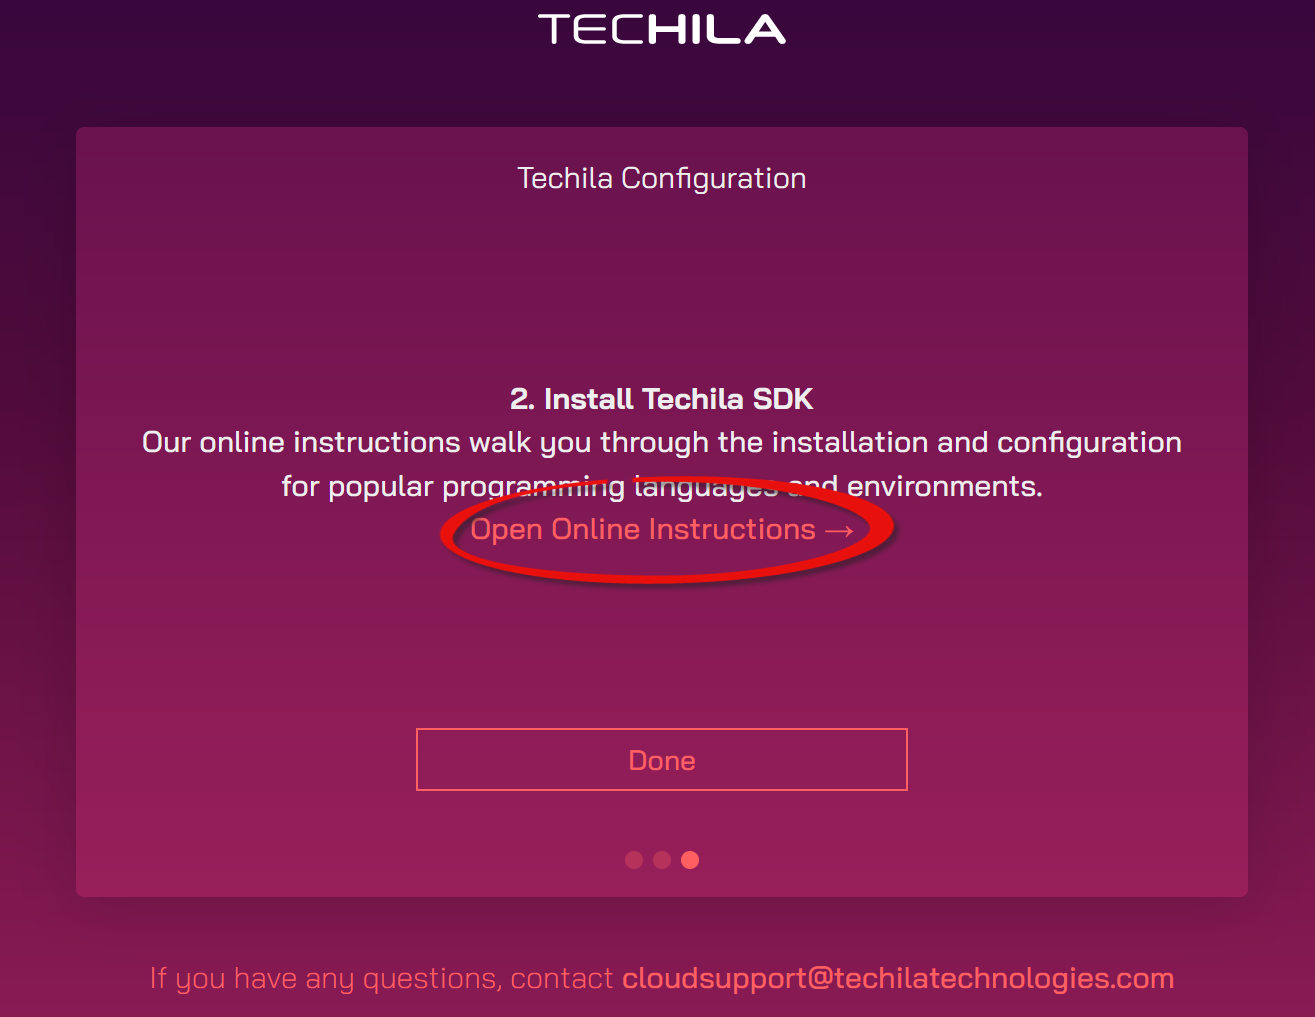
After clicking the Continue button, the second page of the Techila Dashboard will be displayed. This page contains a link to a help page, which contains instructions on how to configure the application plugins on your computer.
Click the highlighted link to open a help page containing links on how to configure the application plugins on your computer.
Please follow the instructions on the help page to configure the application plugins for the programming language you are using before continuing.
For reference, the below table contains the direct links to programming language specific instructions describing the application plugin configuration steps:
| Programming Language | Link |
|---|---|
Python |
|
R |
|
MATLAB |
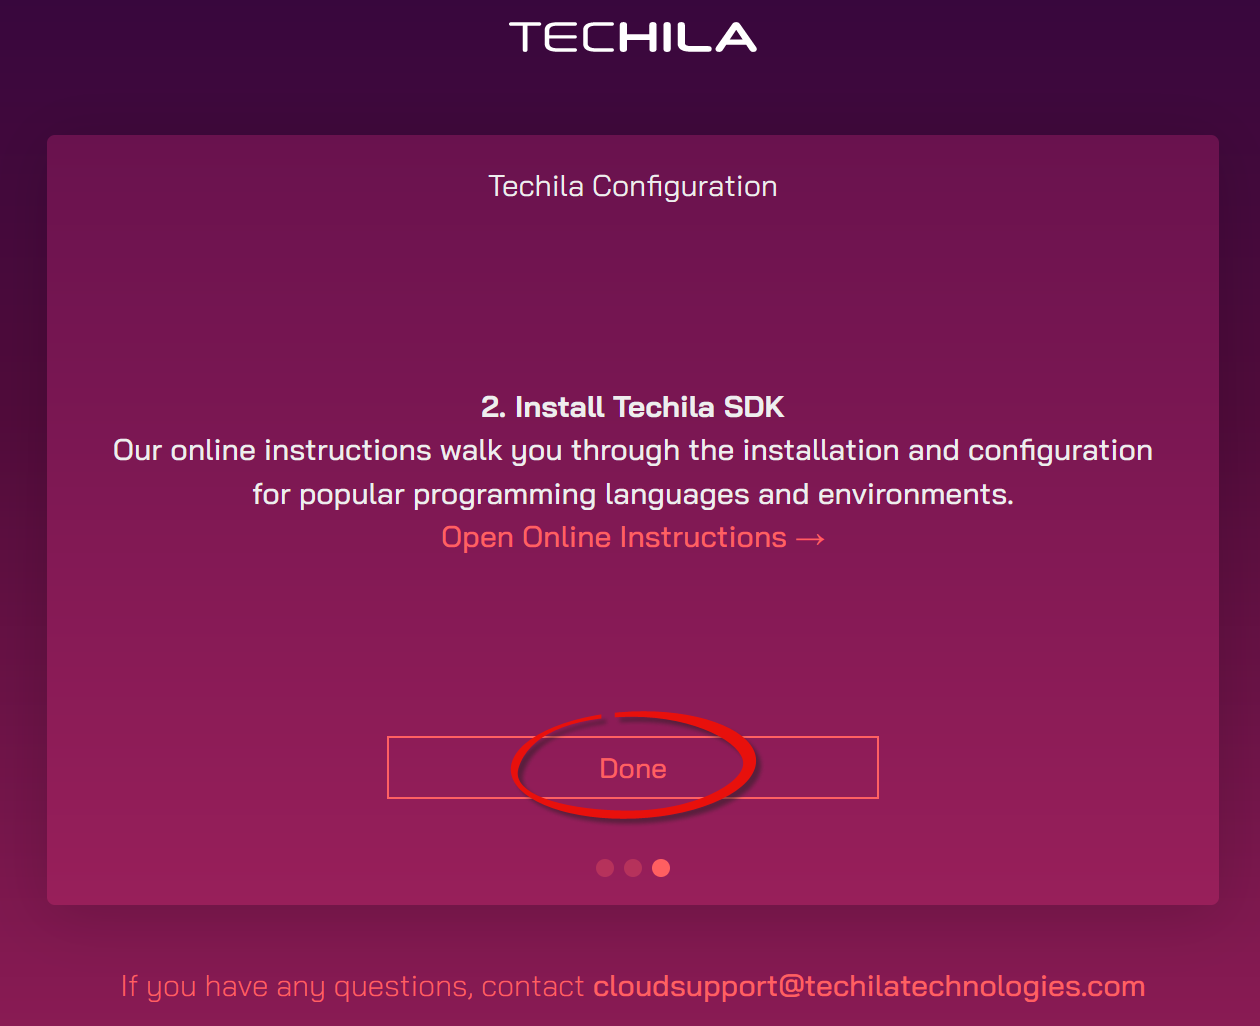
Select your web browser and navigate to the third page of the Techila Dashboard using the Continue button.
5. Increasing Computing Throughput
This chapter gives a short description on how to increase the amount of computing capacity available, for more detailed information please see the this chapter in the user guide.
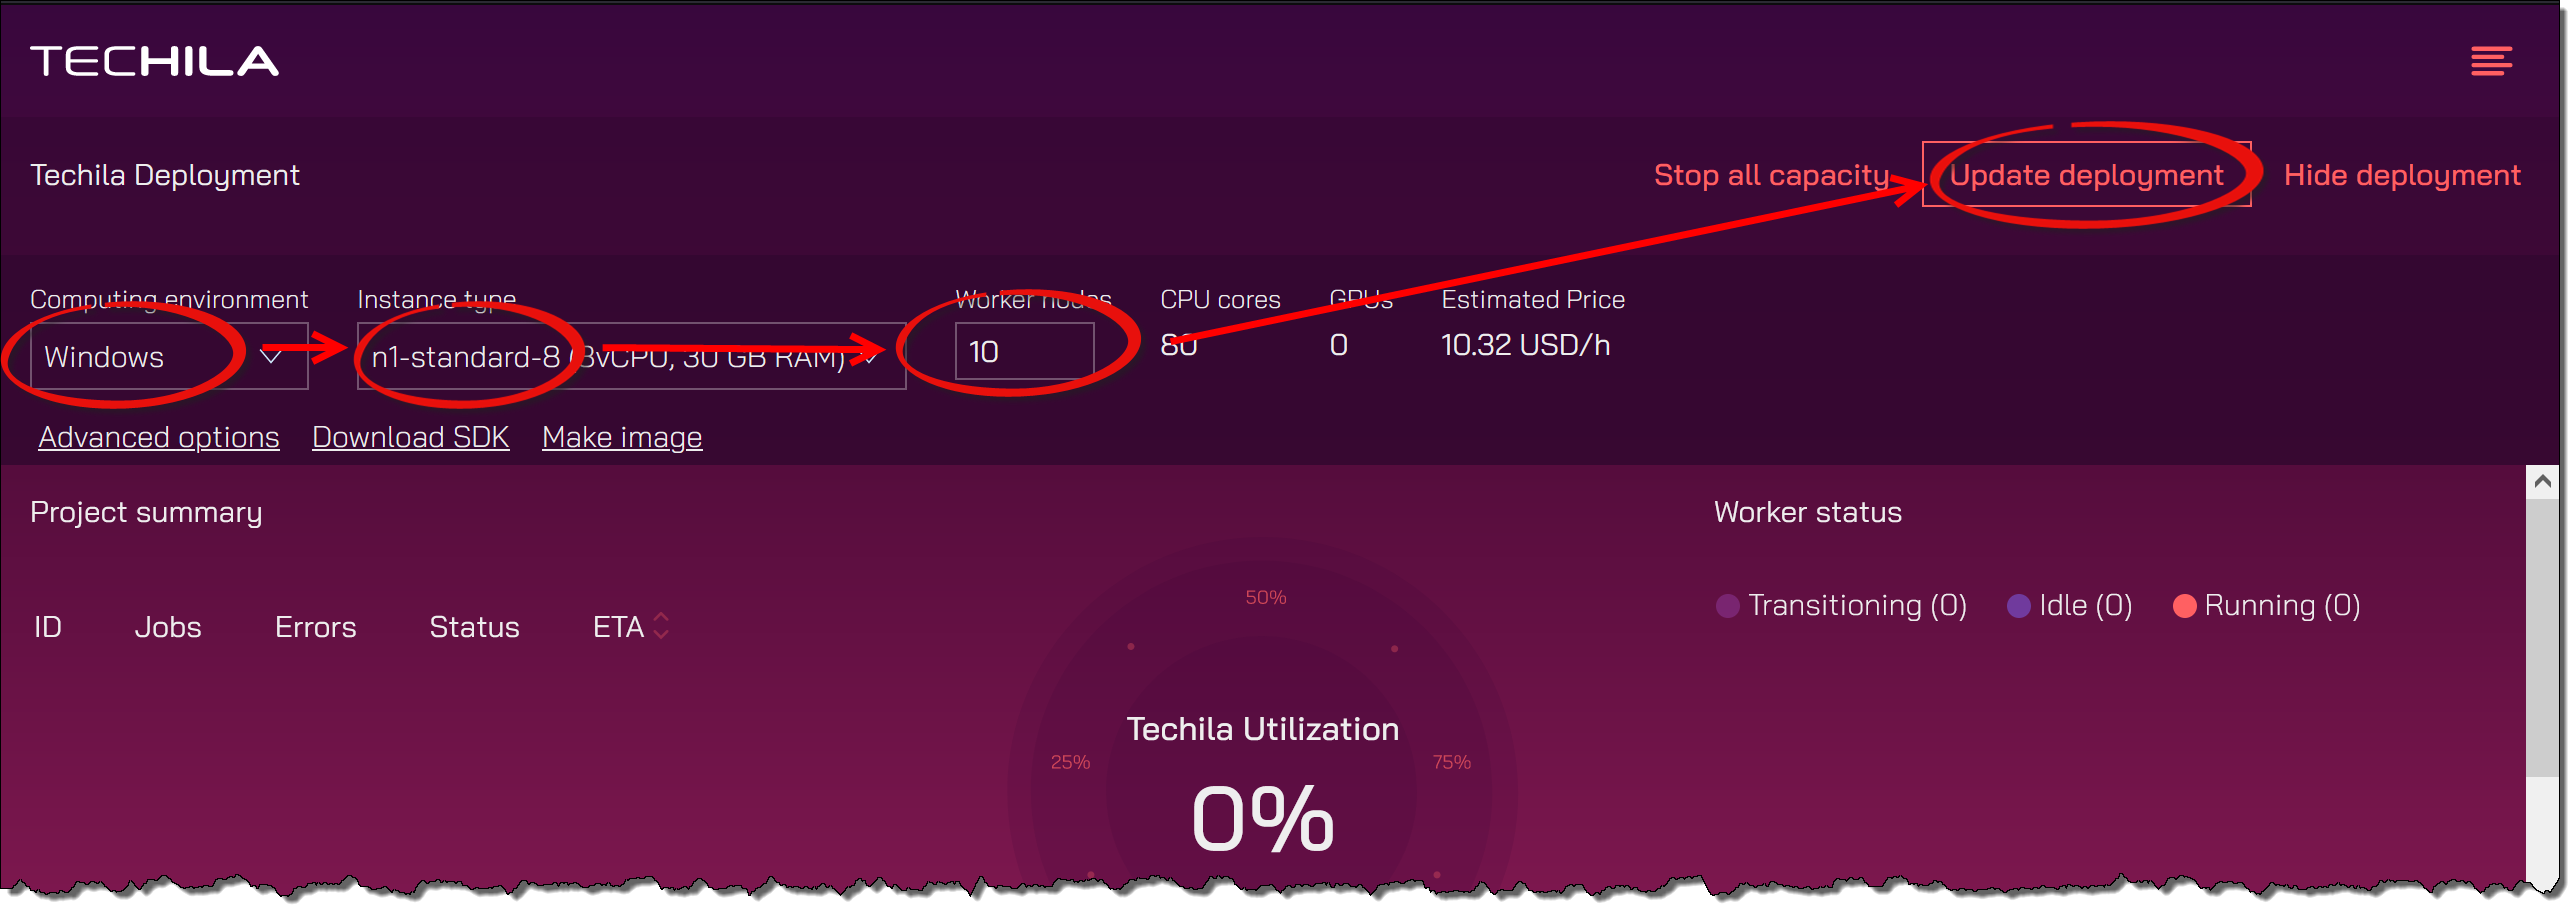
The third page of the Techila Dashboard is used to adjust the computing throughput by starting and shutting down Techila Worker VM instances. Tip! Add this page to your browser’s bookmarks so you can easily access it later.
To start Techila Workers select the Techila Worker VM instance type, choose the operating system and define how many Techila Worker VM instances you want to start.
Note! If you are using Google Free Trial credits, you can only start Techila Workers that have a Linux operating system. Microsoft Windows instances are not included in the Google Free Trial.
After defining the properties listed above, click the Start button to start the Techila Workers.
If you already have Techila Workers that are running, you can increase (or decrease) the amount of Techila Workers by entering the desired number in the field and clicking the Update button.
Techila Workers will be started when the Start button is clicked.
After clicking the Start button, the deployment process for the Techila Workers will start. Progress information will be displayed in the operations view. As the compute nodes come online, they will be displayed under Worker status view.
6. Running Computations
Verify functionality by executing one of examples included in the Techila SDK. Simple examples for R, Python and MATLAB can be found in the following Techila SDK directories:
| Programming languege | "Hello World" Example |
|---|---|
Python |
https://www.techilatechnologies.com/techila-for-gcp-marketplace/python-hello-world |
R |
https://www.techilatechnologies.com/techila-for-gcp-marketplace/r-hello-world |
MATLAB |
https://www.techilatechnologies.com/techila-for-gcp-marketplace/matlab-hello-world |
Additional information on how to use the Techila Distributed Computing Engine functions from different programming languages can be found using the following links. These documents can be used as reference material on how to implement different TDCE features when modifying your own code to run in TDCE.
Note! After starting Techila Workers, program specific runtime components will be transferred from the Techila Server to the Techila Workers during the first Project. Depending on the programming language you are using, the transfer process may take several minutes. After the runtime components have been transferred, they will be stored on the Techila Workers' hard disks and will be stored there until the Techila Worker VM instances are deleted. During subsequent Projects, the runtime components will be used from the Techila Worker’s hard disk, meaning there will be no network transfer delay.
After you have completed processing computational workloads, it is recommended to delete ALL Techila Workers VM instances to prevent unnecessary costs from being incurred. Instructions for deleting Techila Worker VM instances can be found in Decreasing Computing Throughput.
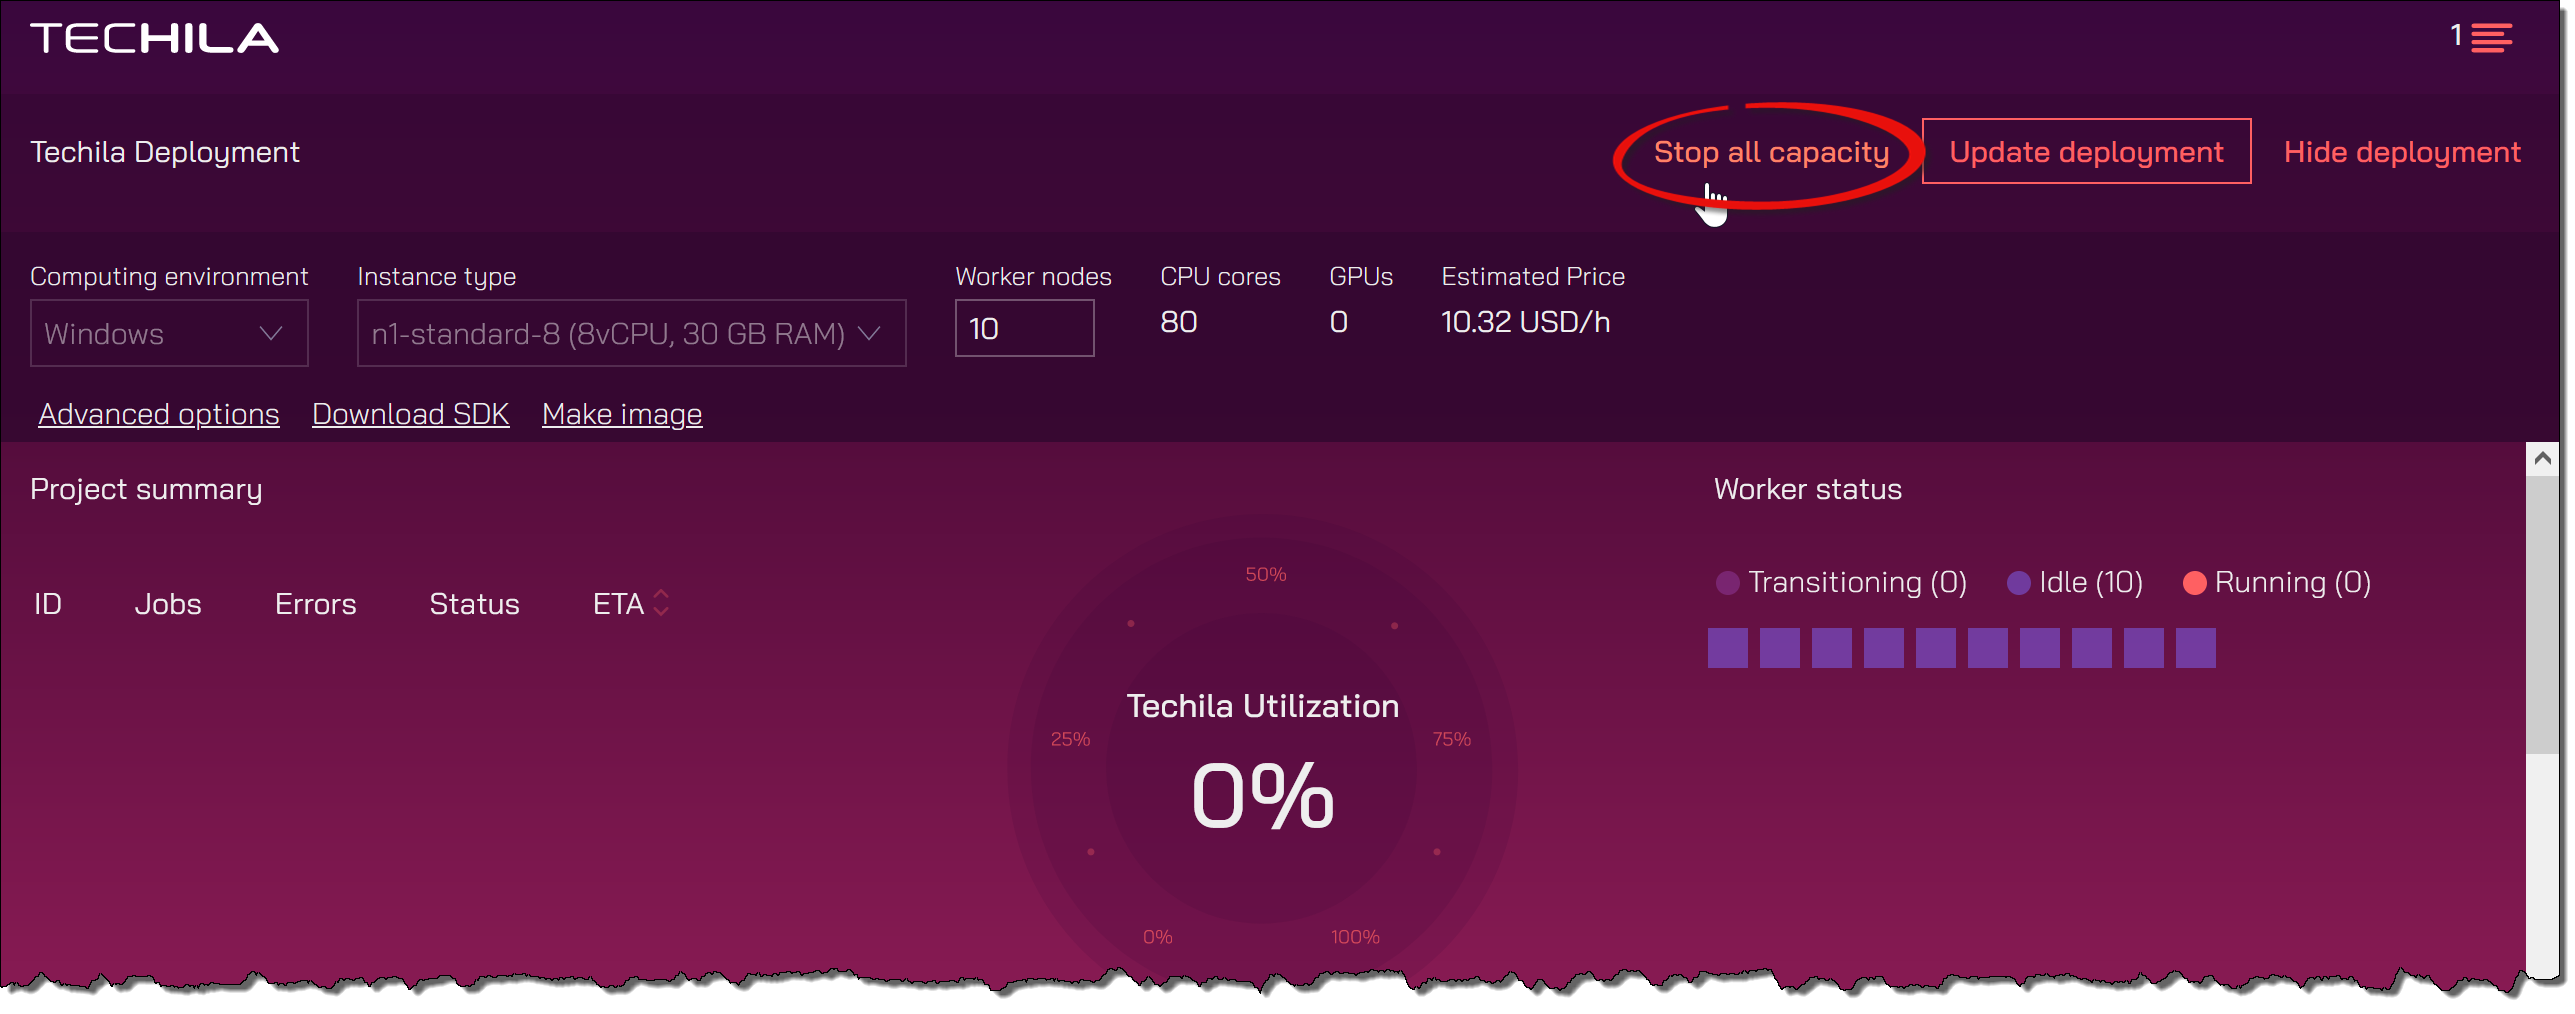
7. Decreasing Computing Throughput
This chapter gives a short description on how to decrease the amount of computing capacity available, for more detailed information please see the this chapter in the user guide.
Note! If you are deleting instances, it is strongly recommended that the deletion of the instances is always verified using the Google cloud console .
Note! Do not delete the Techila Server, as it will be needed again when you want to start new Techila Workers.
To delete ALL Techila Worker VM instances, click the Stop button.
8. Next Steps
Congratulations! When you reach this point, you should have successfully set up a TDCE environment and run your first computational Project.
As mentioned earlier, this document is a quick start version of the full user guide. If you want to have more detailed information about the deployment and management process, please see the full guide.
Finally, when modifying your own code to run in TDCE, please feel free to use the programming language specific guides below as reference material. Among other things, you can find walkthroughs of examples on how to enable various Techila Distributed Computing Engine features.