1. Introduction
The Techila Distributed Computing Engine environment consists of three main components: Techila Server, Techila Workers and the Techila SDK. Each of these components generates log information that can be useful when troubleshooting the system. This document describes how to retrieve log information related to your Techila Distributed Computing Engine environment and send the material to Techila Support staff.
1.1. Example Support Flow
This chapter contains a short, hypothetical example on how an End-User could contact Techila Technologies support if they encounter a problem while using Techila Distributed Computing Engine.
Let’s assume an End-User named John encounters a problem during his computational Project, which results in the computations failing. John is not sure on what the exact cause was for the failure or what needs to be done to fix the problem. In this case, John can create a log package that includes the Techila SDK Logs and send the log package to Techila Technologies.
As John is using Python, he can follow the steps in Python to generate the log package by running a single python command in their python environment.
Let’s also assume that John is using Google Cloud Platform Marketplace. In this case, John can send the log package to Techila Technologies via email to cloudsupport@techilatechnologies.com.
Techila support staff will then analyse the logs and assist John in solving the problem. If needed, Techila support staff might ask John for additional details, which might include the Techila Server Logs and/or the Techila Worker Logs.
1.2. Log Types
There are three different types of logs that may be needed when doing troubleshooting. Information on how to retrieve information of different Techila Distributed Computing Engine components can be found in the following chapters.
1.3. Where to Send the Logs
When contacting Techila support, please send the log files to either cloudsupport@techilatechnologies.com or the support address listed in your service agreement with Techila Technologies.
2. Determining the Techila Server IP Address
In order to download either the Techila Server or Techila Worker logs, you will need to determine the IP address of your Techila Server. This chapter describes different approaches on how the IP address can be determined. If you already know your Techila Server’s IP address / network address, you can skip the steps described in this chapter.
2.1. Retrieving the IP Address using your Web Browser
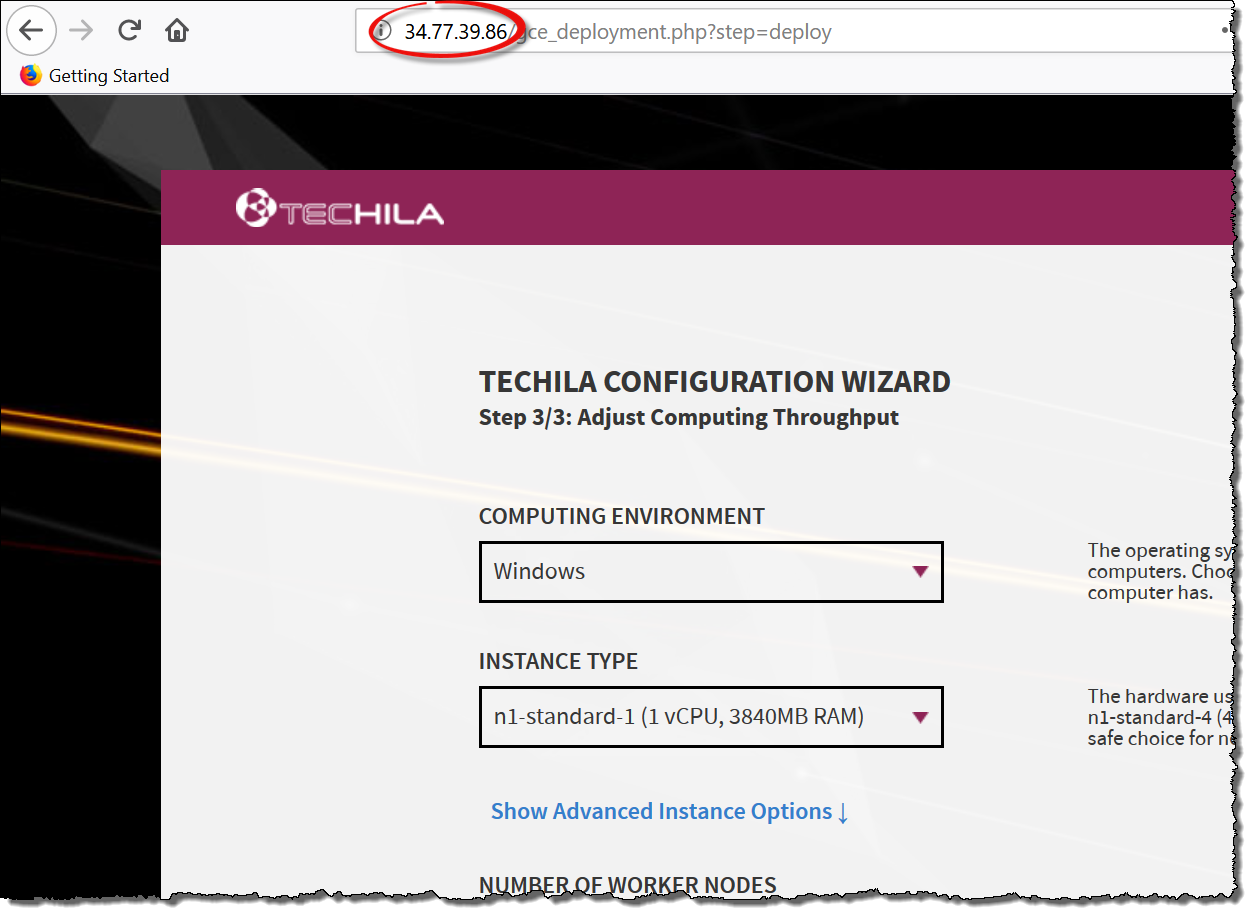
If you are using Techila Distributed Computing Engine in Google Cloud Platform Marketplace, your Techila Server’s IP address will always be visible when you access the Techila Configuration Wizard. The IP address of the Techila Server is illustrated in the example below:
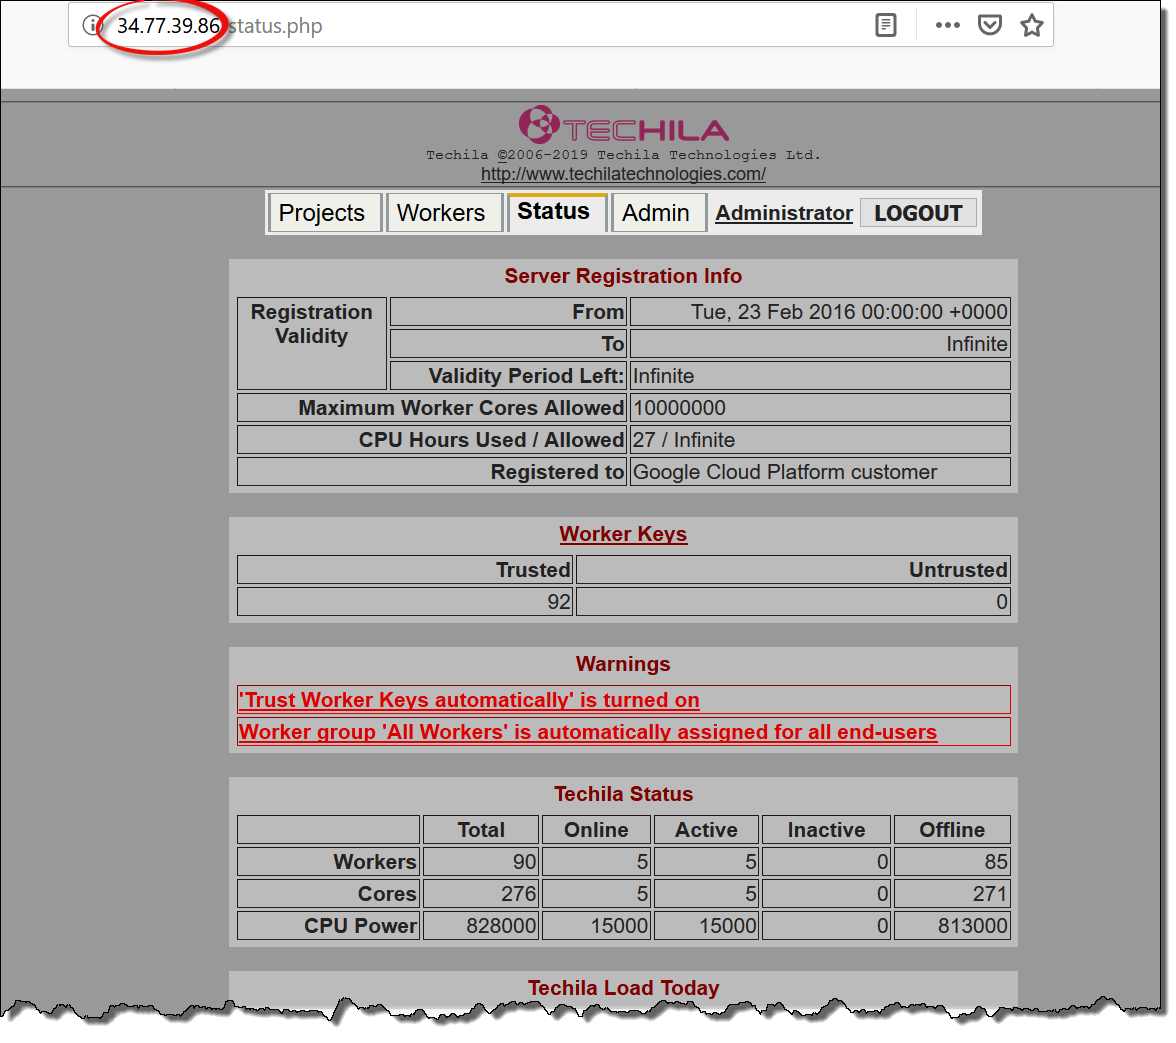
Respectively, if you are using an on-premise TDCE environment, your IP address will always be visible when accessing the Techila Web Interface. The IP address of the Techila Server is illustrated in the example below.
2.2. Retrieving the IP Address from the Techila Configuration File
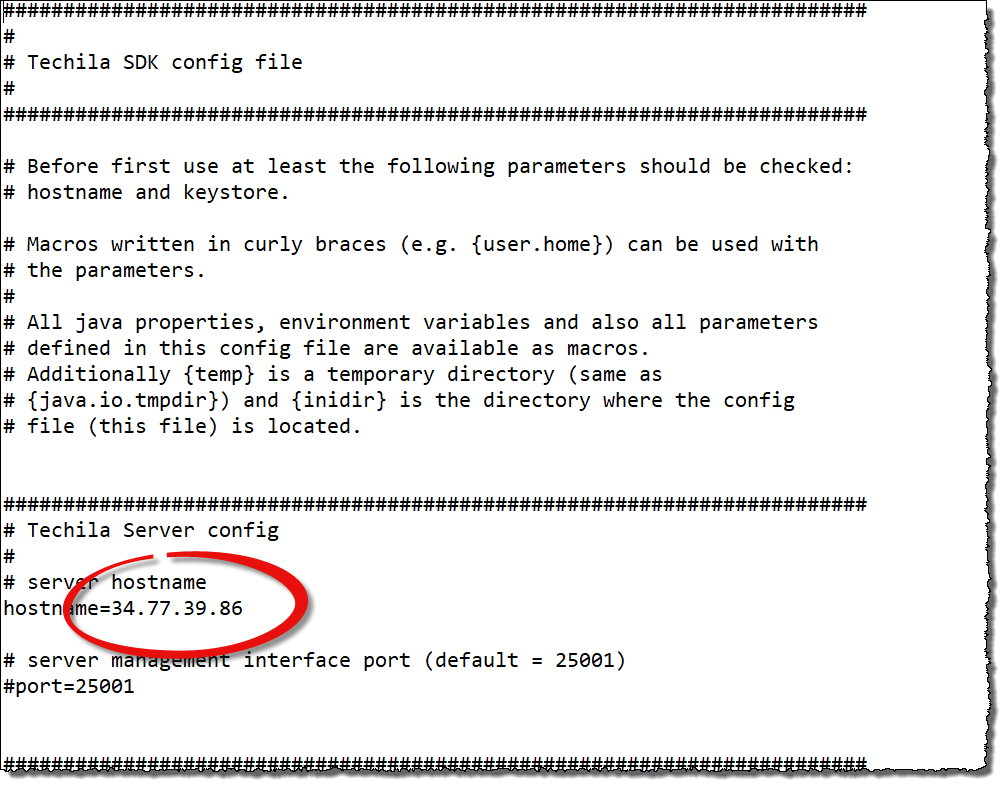
You can check the IP address by opening the techila_settings.ini file that is located on your computer. The techila_settings.ini file is typically located either in your home directory or in the Techila SDK’s techila directory. To find out the IP address, open the techila_settings.ini file with a text editor and locate the hostname parameter. The value of the parameter is the IP address as illustrated below.
3. Techila SDK Logs
Techila SDK logs can be generated by running the programming language specific support functions. The following chapters describe how this can be done in MATLAB, Python, R and from the Command Line Interface.
3.1. MATLAB
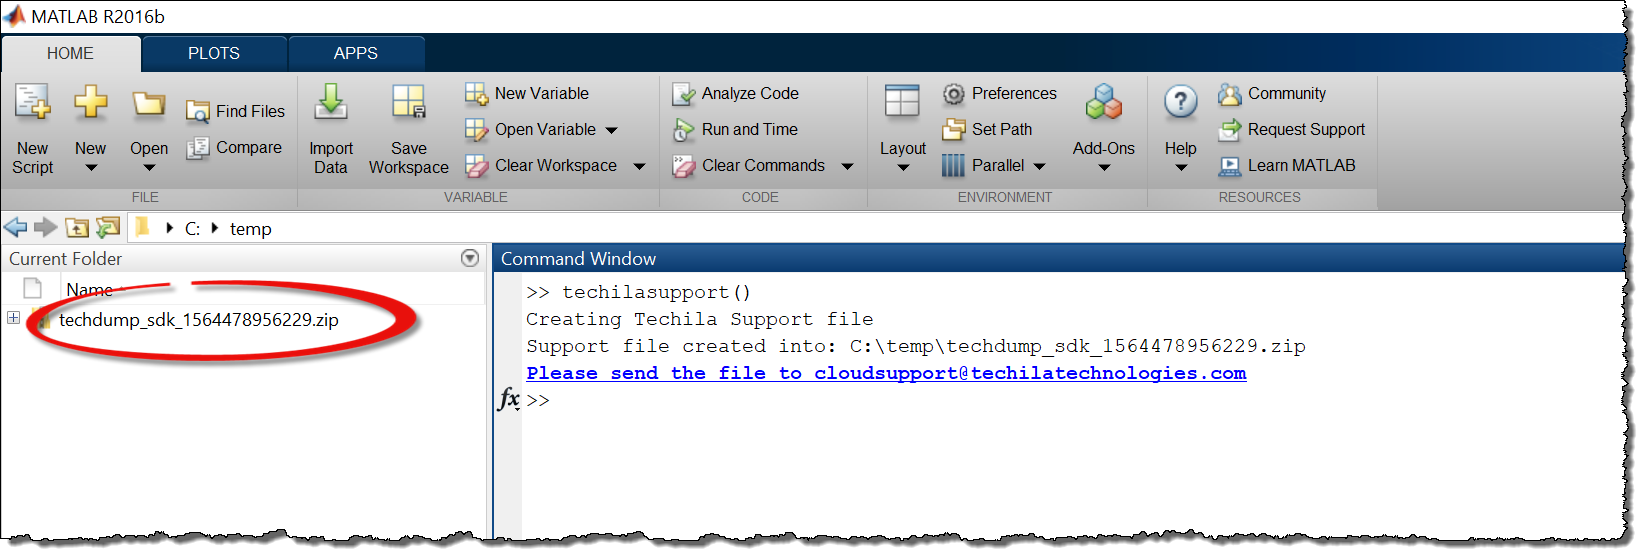
When using MATLAB, you can create a zip file containing the Techila SDK log files by running the following command in MATLAB.
techilasupport()
This command will create a zip file in the current working directory that contains log information about the Techila SDK and the installation environment.
The example screenshot shows the command output and highlights the zip file that has been created.
3.2. Python
When using Python, you can create a zip file containing the Techila SDK log files by running the following commands in Python.
import techila
techila.support()
This command will create a zip file in the current working directory that contains log information about the Techila SDK and the installation environment.
The example screenshot shows the command output and highlights the zip file that has been created.

3.3. R
When using R, you can create a zip file containing the Techila SDK log files by running the following commands in R.
library(techila)
techilasupport()
This command will create a zip file in the current working directory that contains log information about the Techila SDK and the installation environment.
The example screenshot shows the command output and highlights the zip file that has been created.

3.4. Command Line Interface
When using the command line interface, you can create a zip file containing the Techila SDK log files by running the following commands in your command prompt / terminal.
java -jar <full_path_to>\techila\lib\techila.jar support
You will need to replace <full_path_to> with the path leading to your Techila SDK’s techila directory.
This command will create a zip file in the current working directory that contains log information about the Techila SDK and the installation environment.
The example screenshot shows the command output and highlights the zip file that has been created.

4. Techila Server Logs
Techila Server are log files generated by the Techila Server. These logs can be downloaded by using the Techila web interface. Please note that Techila Server logs can only be retrieved by user’s that have administrative access to the Techila Server. If you are using Techila Distributed Computing Engine in Google Cloud Platform Marketplace, you will automatically have administrator access.
The following steps describe how to download the Techila Server logs. In the examples in this document, our Techila Server has IP address 34.77.39.86. Your Techila Server will have a different network address.
-
Determine the IP address of your Techila Server as described in Determining the Techila Server IP Address.
-
After determining the IP address, navigate to the
support.phppage using your web browser. This can be done by manually adding thesupport.phpafter the IP address:http://<Your_Techila_Server_IP_Address>/support.php
Note! The examples in this document assume that you are using
httpto access your Techila Server. If you are usinghttps, please modify the URL accordingly.As mentioned, we are using a Techila Server that has IP address is
34.77.39.86for the examples in this document. This means that the correct URL would be:http://34.77.39.86/support.php # Example. Your Techila Server will have a different IP address.
-
After loading the page, you should be presented with the support page that can be used to get the Techila Server logs. Click
Requestbutton next to theRequest Server Support Filetext to generate the log file package.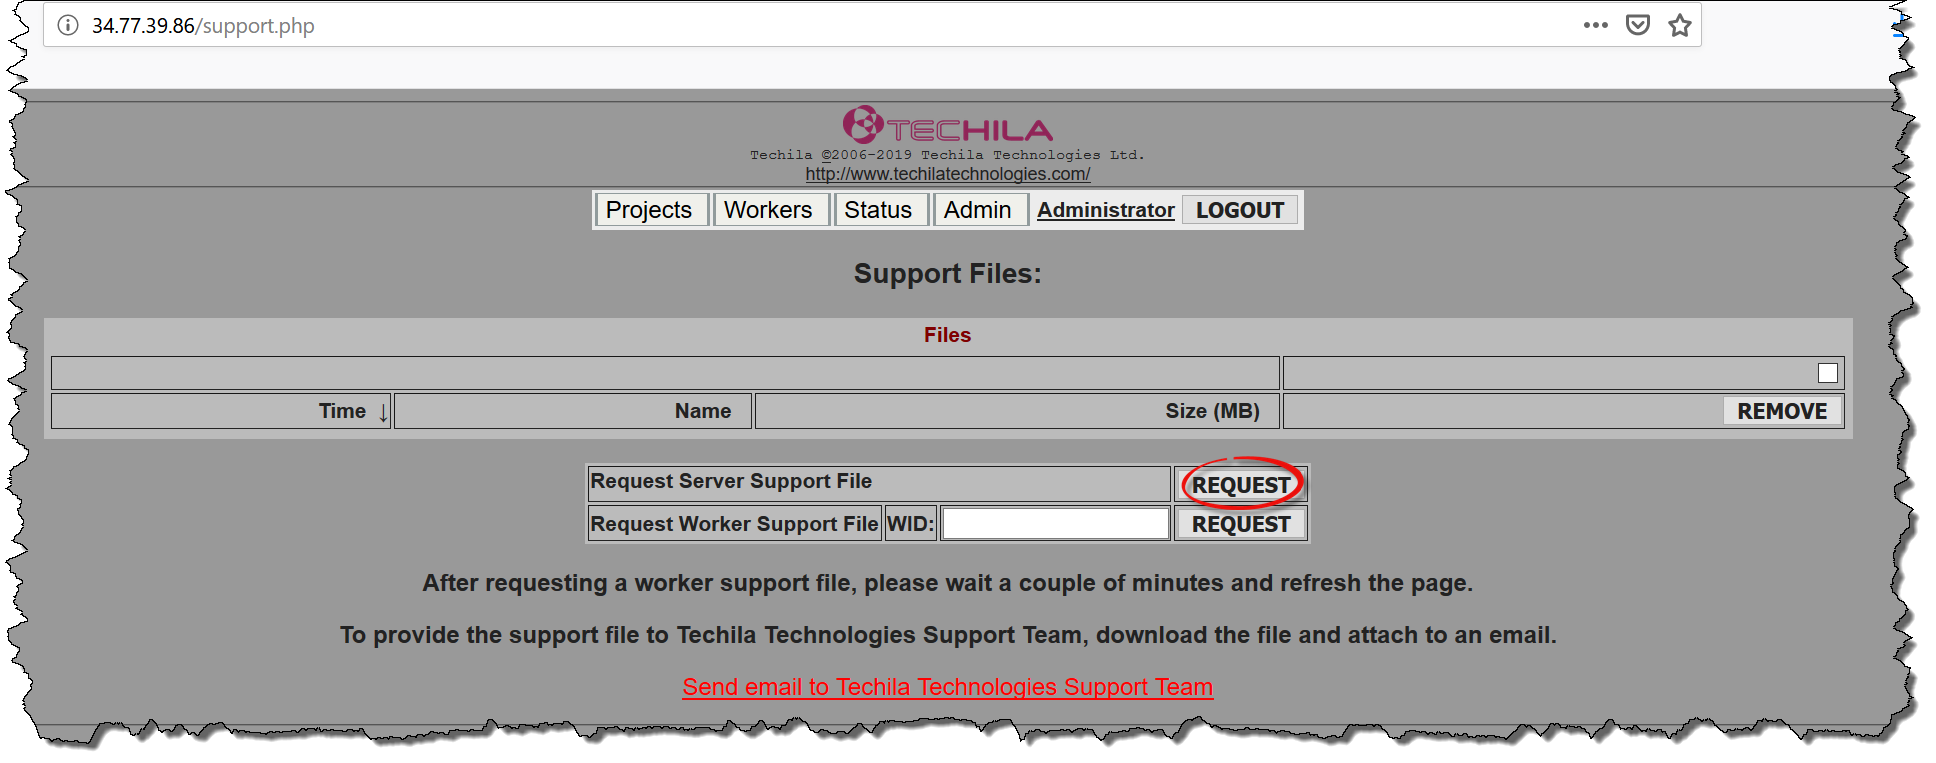
-
Wait for the file to be generated. Depending on the logging settings of your Techila Server, this may take several minutes.
-
When ready, the file will be listed in the
Filestable. When the file is listed, you can download it to your computer by clicking theDownloadbutton.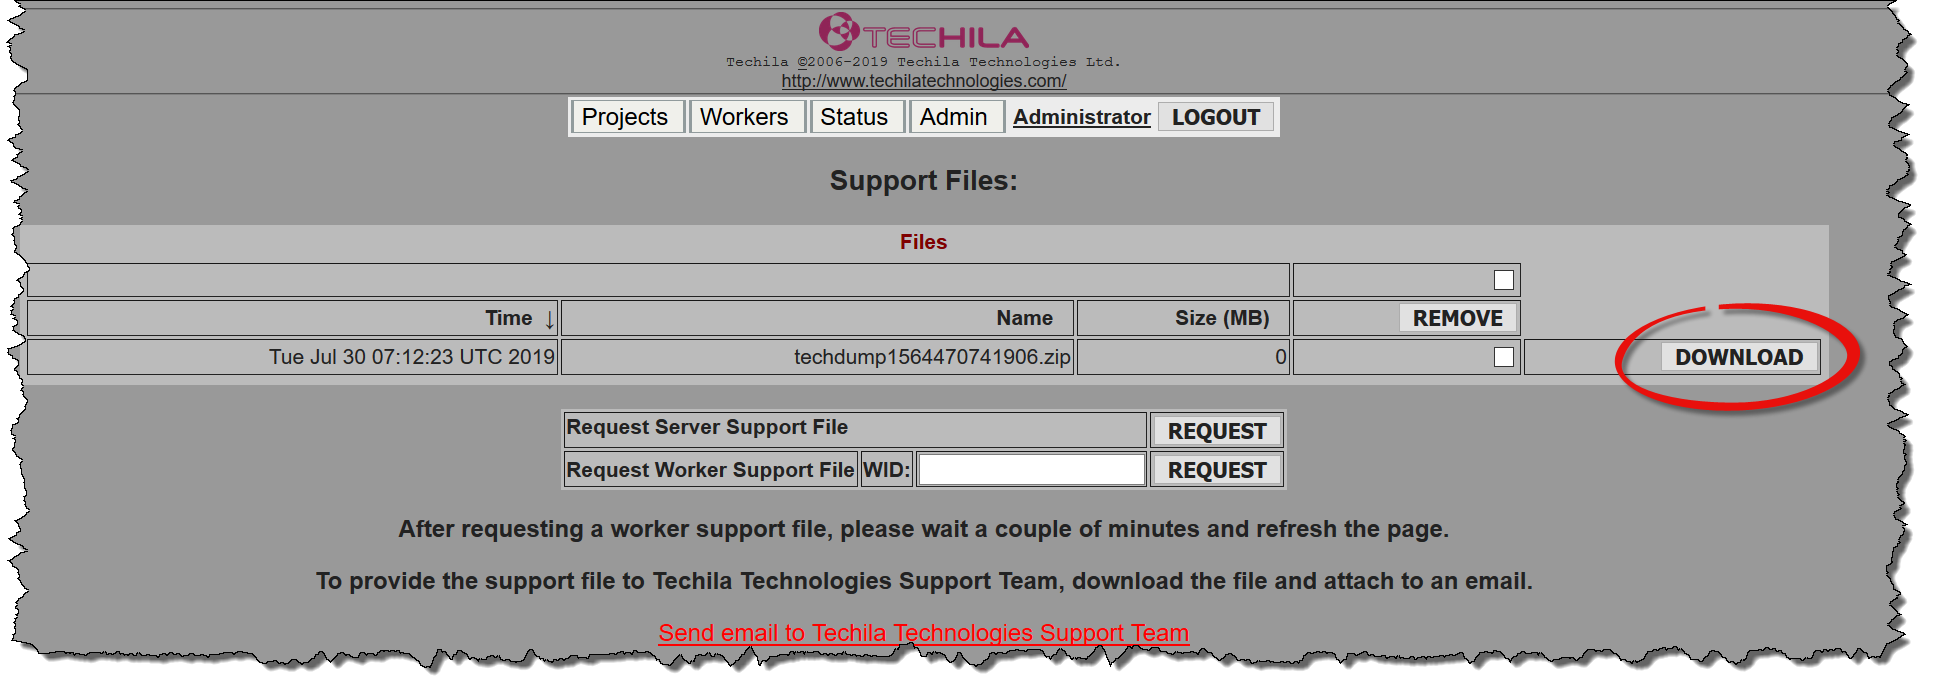
-
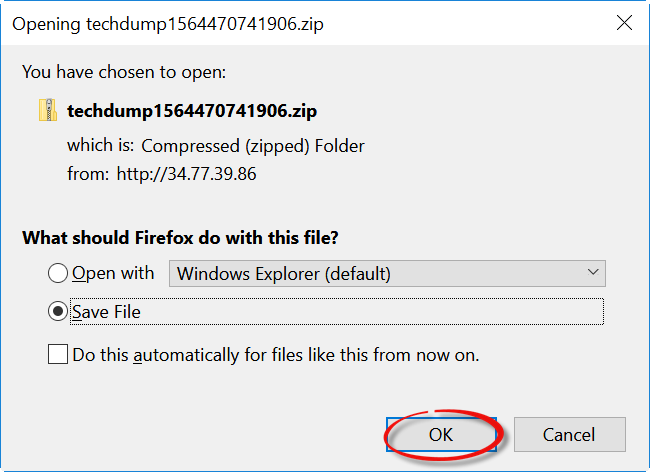
Save the file to your computer.
-
After the file has been downloaded to your computer, send it to Techila Technologies. You can click the
Send email to Techila Technologies Support Teamto create an email template for sending the file.
-
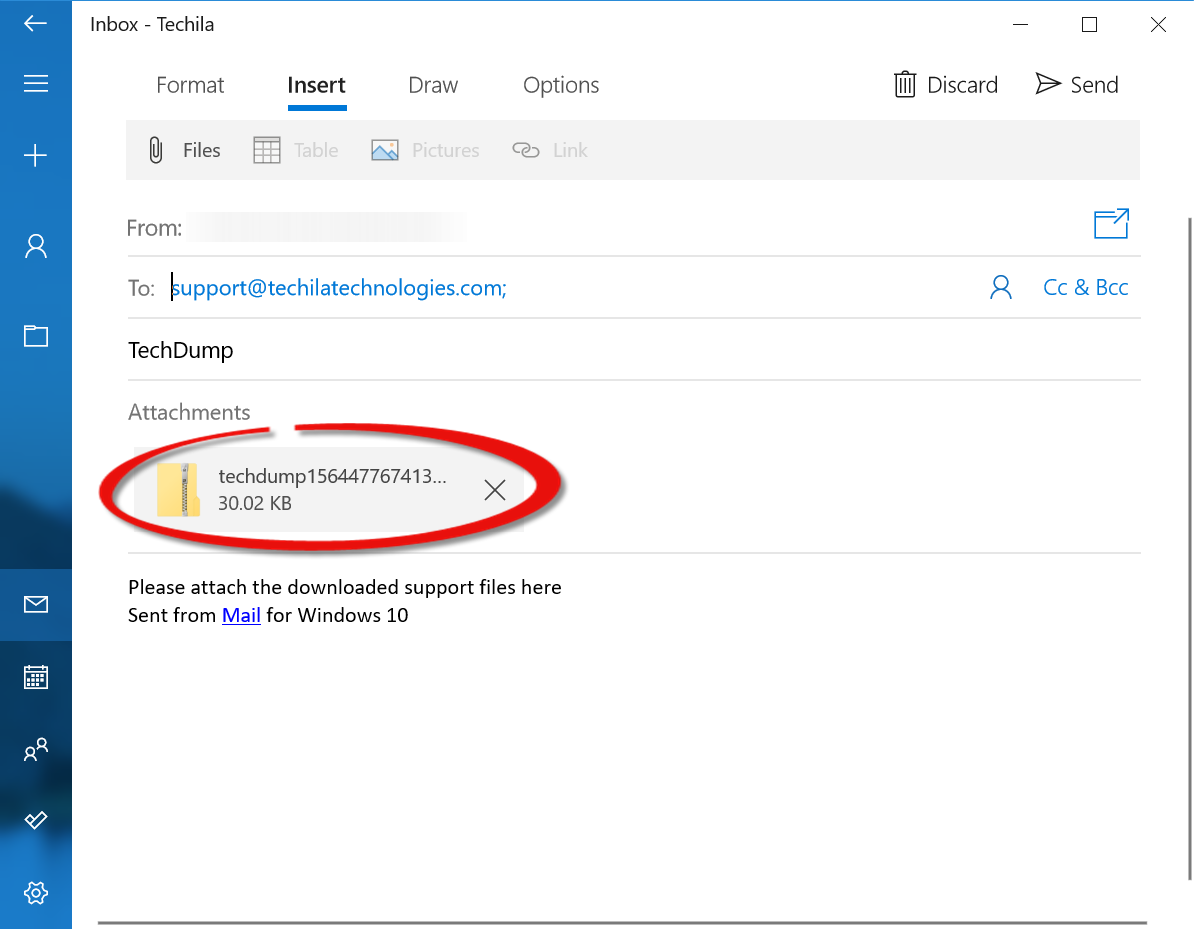
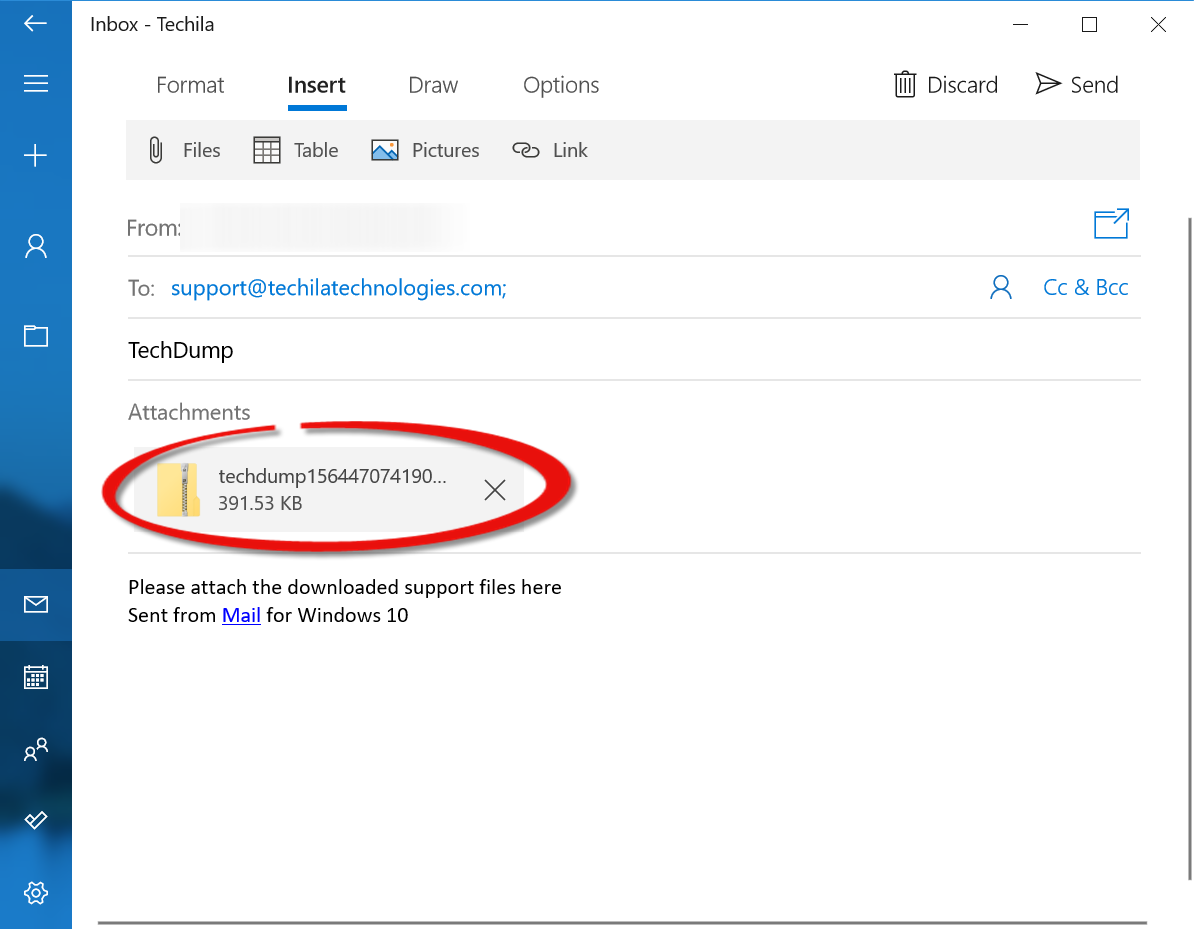
When sending the file, remember to add the zip file containing the logs as an email attachment.
5. Techila Worker Logs
Techila Worker logs are log files generated by the Techila Workers in your TDCE environment. These logs can be downloaded by using the Techila web interface. Please note that Techila Worker logs can only be retrieved by user’s that have administrative access to the Techila Server. If you are using Techila Distributed Computing Engine in Google Cloud Platform Marketplace, you will automatically have administrator access.
The following steps describe how to download the Techila Worker logs. In the examples in this document, our Techila Server has IP address 34.77.39.86. Your Techila Server will have a different network address.
Note! You can only retrieve log information from Techila Workers that are online. If the Techila Worker is not online, you will not be able to retrieve the log information.
-
Determine the IP address of your Techila Server as described in Determining the Techila Server IP Address.
-
After determining the IP address, navigate to the
support.phppage using your web browser. This can be done by manually adding thesupport.phpafter the IP address:http://<Your_Techila_Server_IP_Address>/support.php
Note! The examples in this document assume that you are using
httpto access your Techila Server. If you are usinghttps, please modify the URL accordingly.As mentioned, we are using a Techila Server that has IP address is
34.77.39.86for the examples in this document. This means that the correct URL would be:http://34.77.39.86/support.php
-
After loading the page, you should be presented with the support page that can be used to get the Techila Worker logs.
The text field next to
WID:is used to determine which Techila Worker’s logs will be generated. Depending on your situation, there are two different options on how to get the Worker ID information:-
Option 1: You can get the Techila Worker ID information from any error messages that are generated during a Jobs. These error messages can found either in the Techila SDK’s
techila/logsdirectory or in the error messages displayed in the Status Window after a Job generates an error. -
Option 2: You can get the Techila Worker IDs from the Techila Web Interface, on the
All Workerspage.The example screenshots below illustrate how Option 2 could be used to get the Techila Worker ID.
After entering the WID, click the
Requestbutton next to theRequest Worker Support Filetext to generate the log file package.
-
-
Wait for the file to be generated. Depending on the logging settings of your Techila Server, this may take several minutes.
-
When ready, the file will be listed in the
Filestable. When the file is listed, you can download it to your computer by clicking theDownloadbutton.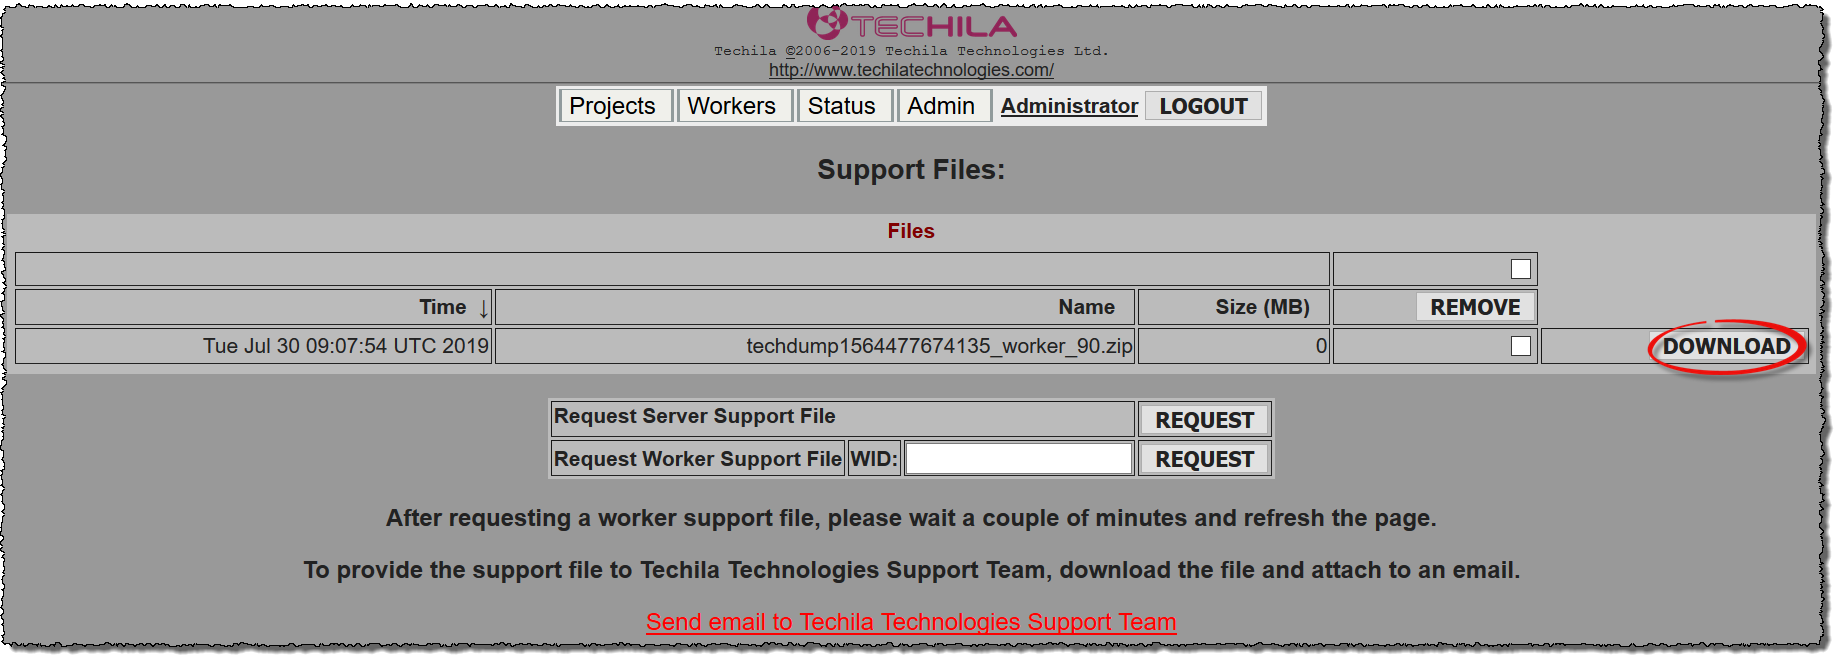
-
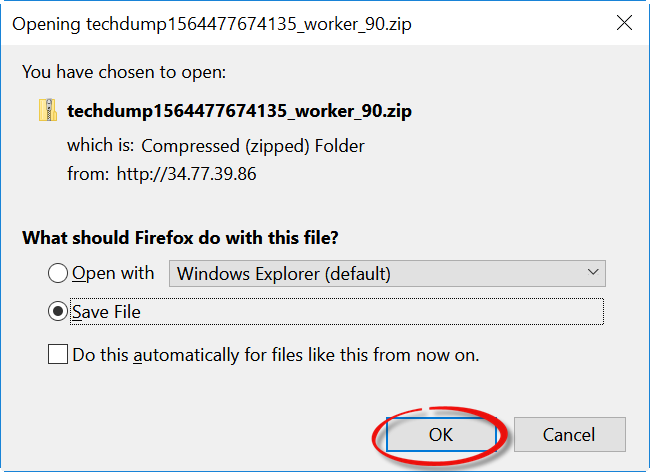
Save the file to your computer.
-
After the file has been downloaded to your computer, send it to Techila Technologies. You can click the
Send email to Techila Technologies Support Teamto create an email template for sending the file.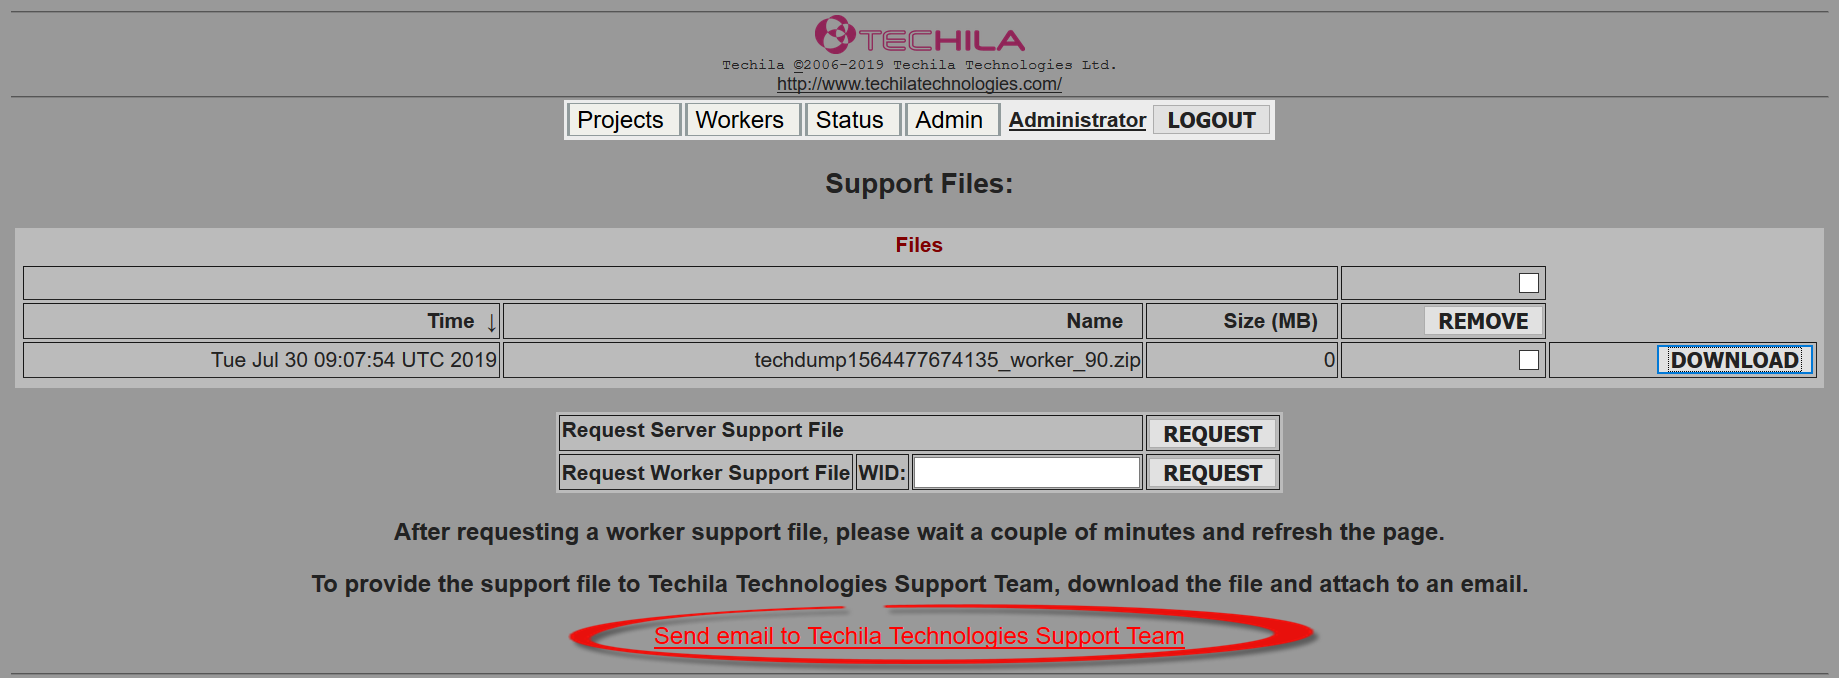
-
When sending the file, remember to add the zip file containing the logs as an email attachment.
